| Exit Print View | |
Oracle Secure Global Desktop User Guide for Version 4.6 |

|
1. Using Oracle Secure Global Desktop
Potentially Unsafe Connection Message
How To Deal With a Potentially Unsafe Connection Message
Number of Instances of an Application
What If I Get an Error Message When Starting an Application?
What If a Chooser Page is Displayed When I Start an Application?
Suspending and Resuming Applications
Session Toolbars for Controlling an Application
Resumability Settings for Applications
Do I Lose My Work If I Close My Browser?
Changing the Way an Application is Displayed
Copying Information Between Applications
Running Applications Using a Different User Name and Password
Using a Single-Button Apple Macintosh Mouse
Printing From UNIX Platform Applications
Printing from UNIX Platform Applications to UNIX, Linux, or Mac OS X Platform Computers
Printing from UNIX Platform Applications to a Windows Computer
Printing From Windows Applications
Printing from Windows Applications to UNIX, Linux, or Mac OS X Platform Computers
Printing from Windows Applications to a Windows Computer
Using SGD From Your Desktop Start or Launch Menu
How to Add SGD to Your Desktop Start or Launch Menu
Working With the Start or Launch Menu
Logging Out Using the Start or Launch Menu
You can configure the following settings by clicking on the Edit button in the Applications area:
Client settings
Application Groups
Each time the SGD Client starts it uses a profile. A profile is a group of configuration settings that control the SGD Client. The settings in a profile define the following:
How the SGD Client connects to an SGD server. For example, the URL to connect to and the proxy server to use.
The operating mode of the SGD Client. For example, whether to display a webtop or whether the list of applications that you can run is displayed in the desktop Start or Launch Menu, known as Integrated mode.
How the SGD Client behaves. For example, if it loses a connection to an SGD server.
You have one profile for each SGD server you connect to.
The available client settings are described in ![]() Appendix C, Profile Settings.
Appendix C, Profile Settings.
You can only edit profiles if your SGD Administrator has configured SGD to let you do this.
You can only edit profiles from a webtop. On your webtop, click the Edit button in the Applications area of the webtop, and then click the Client Settings tab.
You can only edit your own profiles, and you can only edit the profile for the SGD server you are currently connected to.
When you first edit a profile, the settings are the ones that your SGD Administrator has configured for you.
To restore a profile to the system default settings, click the Reset button.
Note - You must log out of SGD and log in again for changes to your profile to take effect.
Only an SGD Administrator can add an application to, or remove an application from, the list of applications that you can run. However, you can choose how and when those applications display on your webtop. You do this by creating groups.
Groups are useful for grouping similar applications together or for hiding applications you do not use very often. How you use groups is up to you.
On the webtop, click the Edit button.
Click the Edit Groups tab.
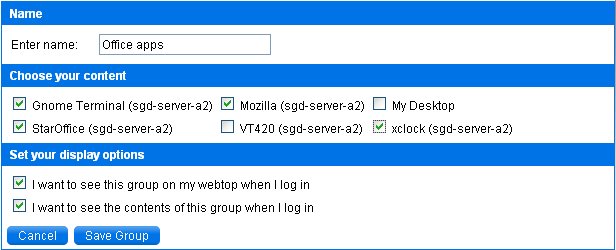
Click the Add New Group button.
Type a name for the group.
In Choose Your Content, select the check boxes for the applications and documents you want to include in the group.
Set the display options for the group.
To hide the applications and the group so that they do not display on your webtop, you deselect the check box next to I Want to See This Group on My Webtop When I Log In.
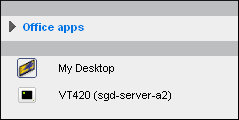
To hide the contents of the group so that only the group name is displayed when you first log in, you deselect the check box next to I Want to See the Contents of This Group When I Log in.

Click the Save Group button.
Click the Update button.
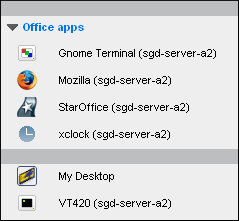
The names of the webtop groups you create are displayed on the webtop.

A separator line to show you which applications are in the group is also displayed.
Click the triangle to hide and show the applications in the group.

You can add as many groups as you like. You can change or delete a group whenever you like. After making a change you must click Update.